The time line works from the bottom to the top, scroll to the bottom to start the story
Pre Build is complete, go to the Final Build to follow the story.
19 December
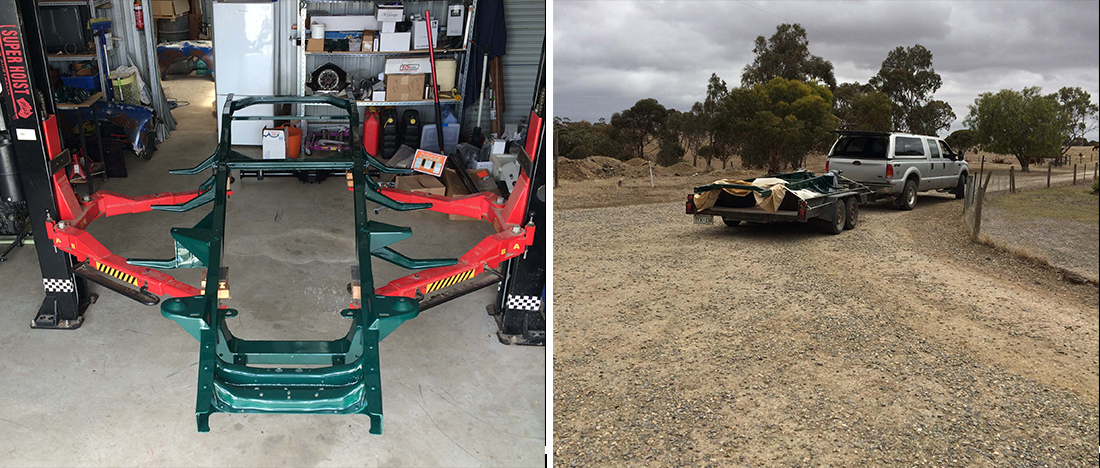
Merry Christmas and time to start the new section see you on the Final Build
Chassis paint job finished today, I will let it harden and start the final build next week.
Suspension bits next to the paint shop and finally the Cab.
The new front suspension hubs were 3mm too large for the rim centres, not sure why the difference? The bolt patters match. The hubs have been shaved to match the rim centres.
6 December
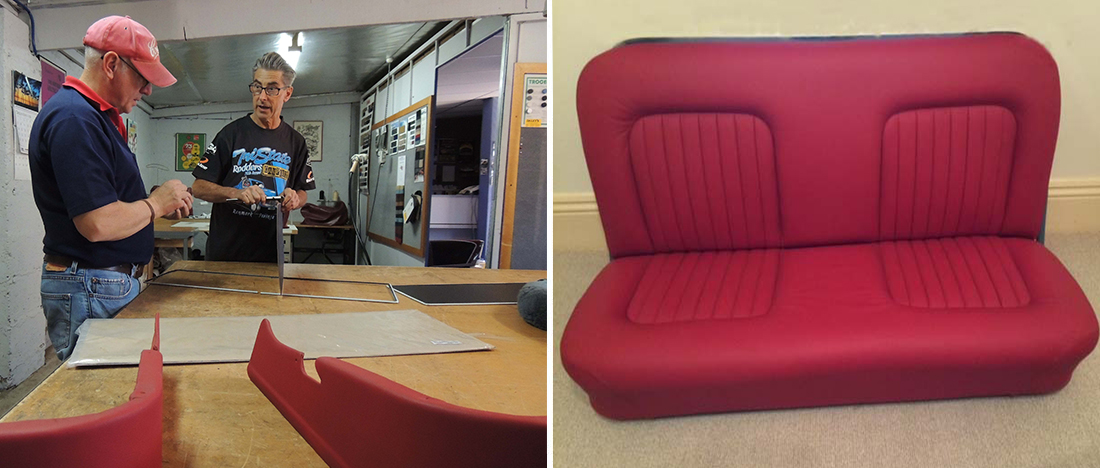
Picked up the seat from Statewide Trim, Steve has repaired the seat frame and welded on new tabs to the seat.
The seat looks great stitched leather.
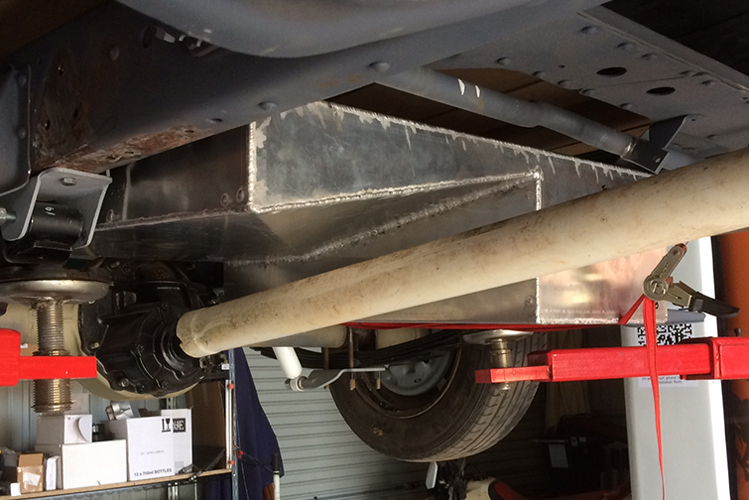
Also picked up the custom fuel tank today, it is designed to fit in the mid tray section under the bed, didn't like the idea of it sitting at the back of the tray even though the tank build would have been easier , estimated 90 litre capacity. I made it a larger capacity as we have set the truck up as a "cruiser".
29 November
Chassis has gone to the paint shop
22 November
Stripped the truck completely ready for the chassis to go to the paint shop
15 November
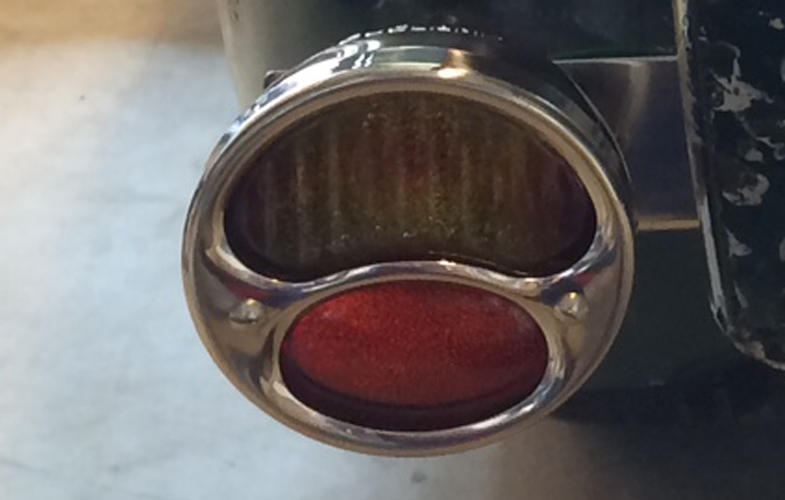
I bought a set of stainless tail light supports for the Chevy, bolt holes were in the wrong place and the holes for the wiring are in the wrong place. The only parts I have bought that have not fitted so far.
Made a set of stainless steel mounts for the rear tail lights, never polished stainless before, though it might be harder. Made them pretty simple with just and angle bend for strength and drilled the holes in the right spots.
1 November
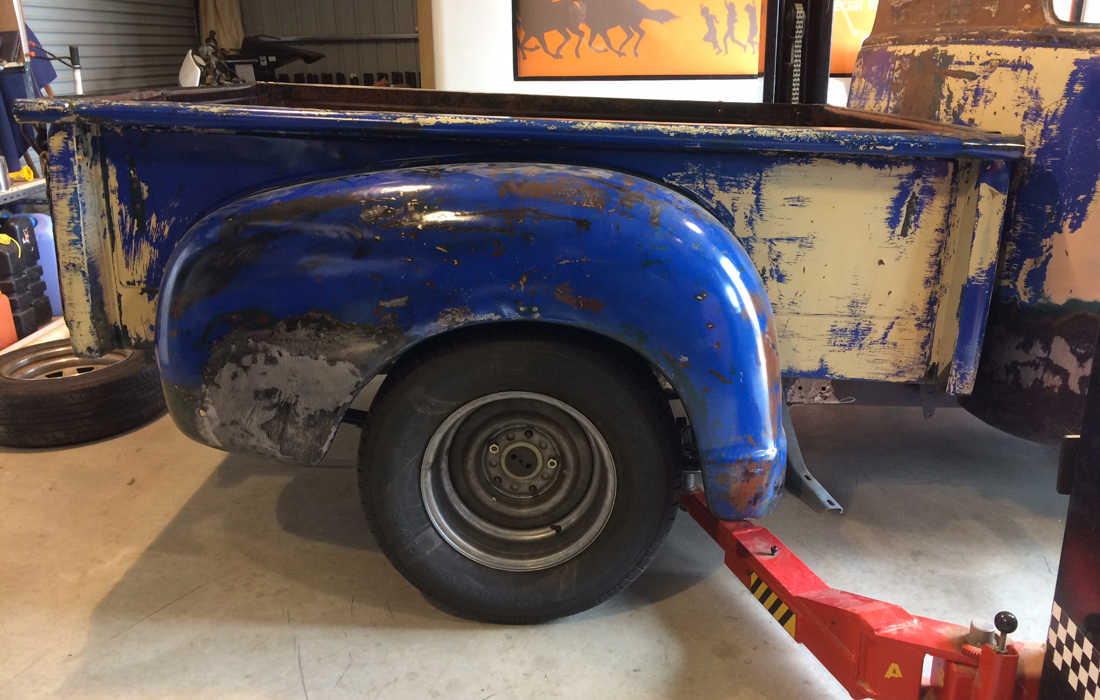
Tried the new rim with the correct tyre, just as well we did a test rim as will need another 15mm of off set to make it 25mm
25 October
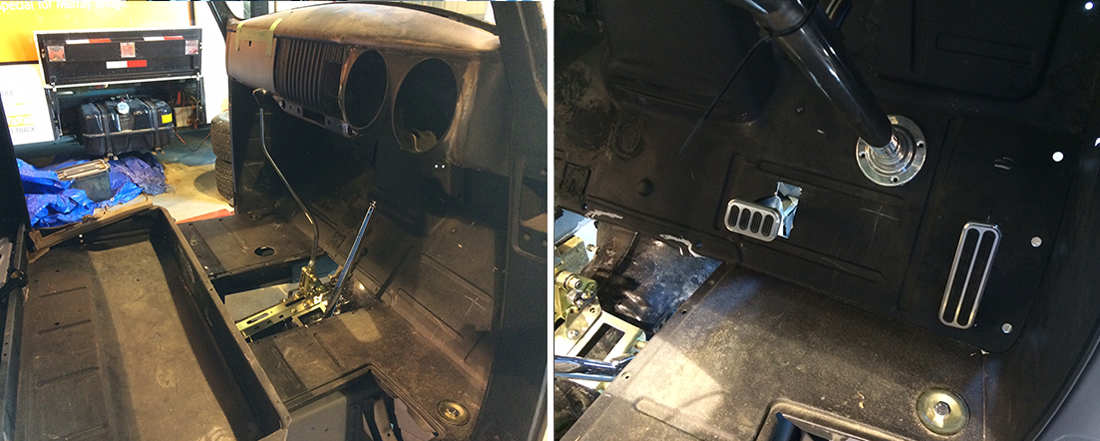
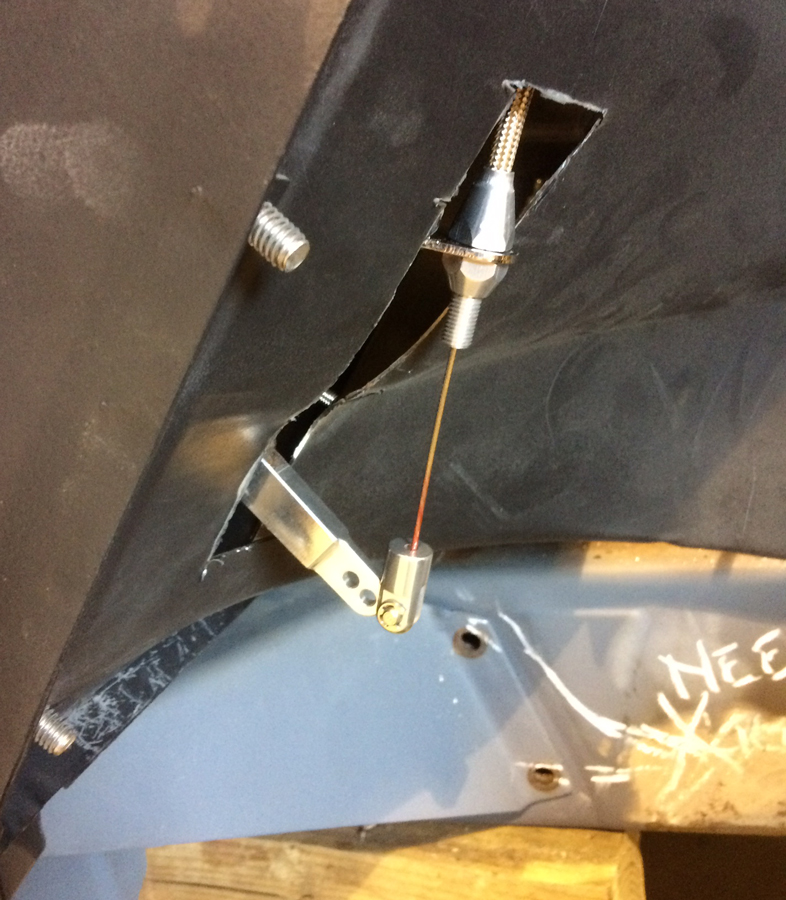
Fitted the Brake peddle mechanism, booster and Master Cylinder, under cab. Cut the hole for the Steering column. The steering shaft is causing a couple of issues as we can not go straight through to the base of the column, need to add another uni joint all very tight but should manage to get past everything. Just realised that the dash is not symmetrical, so where we have cut the gauges from the left there is 120 mm to the door and on the glove box side is only 70mm this has the column sitting straight over the chassis rail. That's why we need the additional uni joint. Had to move the column another 20mm to clear chassis and the huggers, but all good now, ready to strip the truck for the last time.
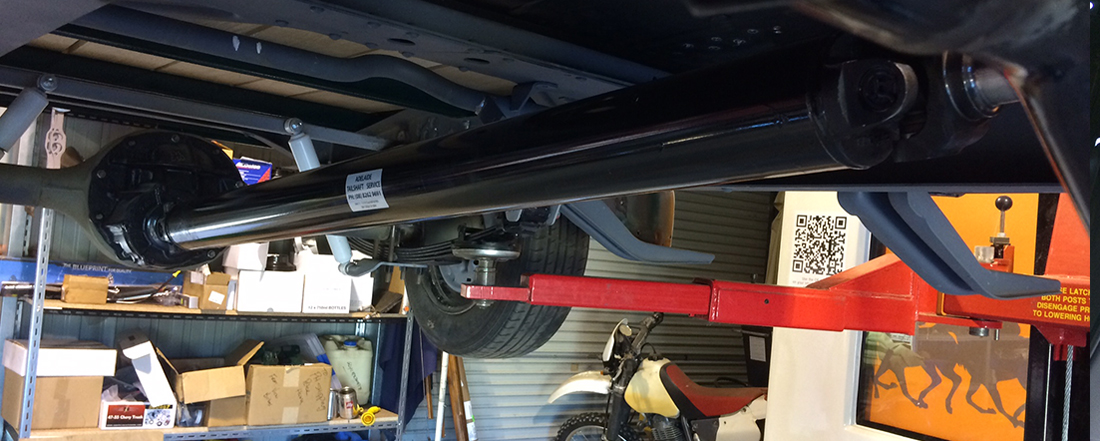
The new custom tail shaft arrived this week and has fitted straight in. There are 3 different yolk measurements for a Ford 9 inch diff so made sure what size the diff was before the order, the other end is straight forward for a turbo 350. All done over the phone, emailed the dimensions to Adelaide Tail Shafts. Delivered to my door, great service.
20 October
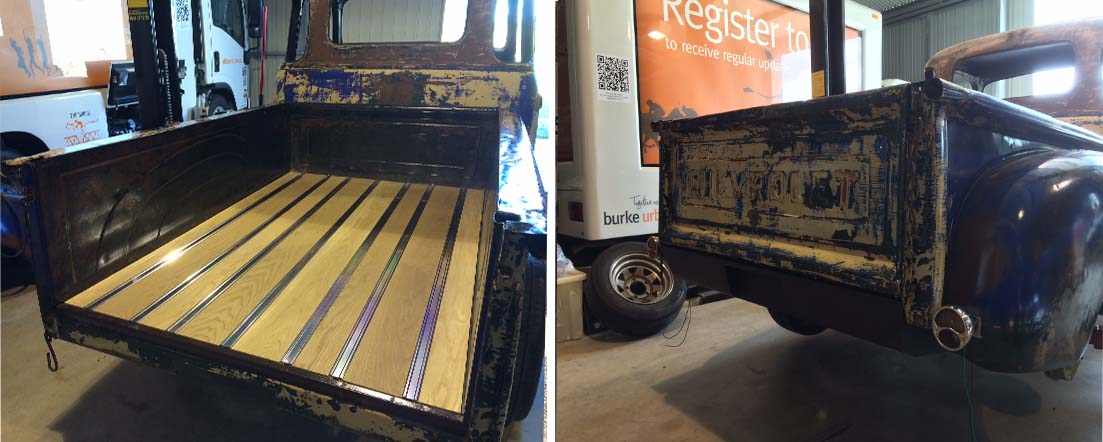
Finished the American Oak tray, used the extruded aluminium spacers with the hidden bolts that slid on the underside of the spacer, looks great, just have to clear coat them and the tray is all finished. Also finished mounting the guards using a 5mm rubber piping between the tray and the guard
18 October
The rims (18x15 inch smoothies) arrived and will look great. We have trial fitted them to get our off set and have asked Adelaide wheel and rim to tack one together to make sure it fits with the correct sized tyre, 275x60
Fitted the new Lokar accelerator peddle and cable. I had to cut a hole in the engine bay panel which we will box up to protect it from stones and the tyres kicking water up to the fire wall. Looks like a nice action on the peddle
13 September
Fitted the new Lokar Auto shifter, The shifter has 3 positions it can be mounted and I have to fit it to the front position which requires an additional linkage which they did not mention in the description only the written installation instructions it was shipped with, so waiting on the linkages. The good news is that there is only a minor mod to the floor cover. I have also ordered the trans mounted hand brake lever which mounts on the shiter mount, will trail fit when it arrives.
Spent some time working out the position of the new steering column, need the seat back to get the exact position. We have been given permission to use a telescopic steering shaft as the collapsible part of the steering as I had already purchased the new column before the Statement of requirements was issued. Looking to install a Borgeson 24" telescopic shaft. It looks like I will be left foot braking with the position of the under cab brake mount coming up on the left of the steering column. Need to finalise the steering position first.
Ordered the rims this week, they are coming in pieces and we will fit to get the set back and then the guys at Adelaide Wheel and Rims will put them together.
6 September 2014
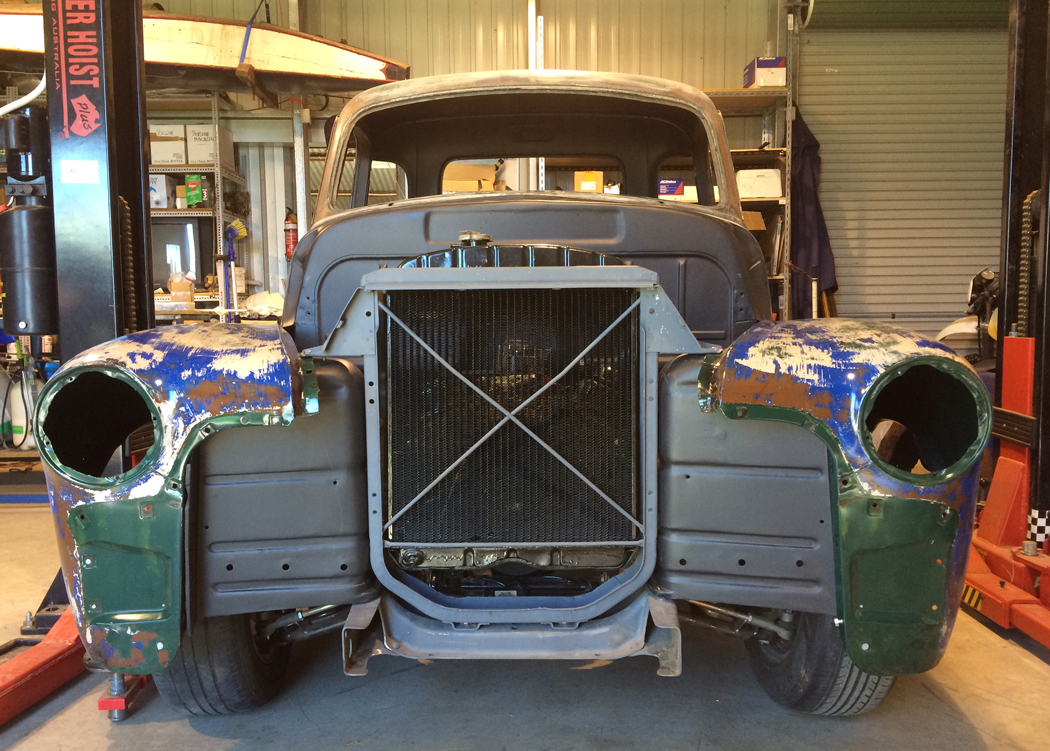
Fitted the cab back onto the mounts and have cleared the trans and engine, only just thought.
Trail fitting of the front panels had a clash with the engine bay panels and had to do some minor cutting to get past the new suspension.
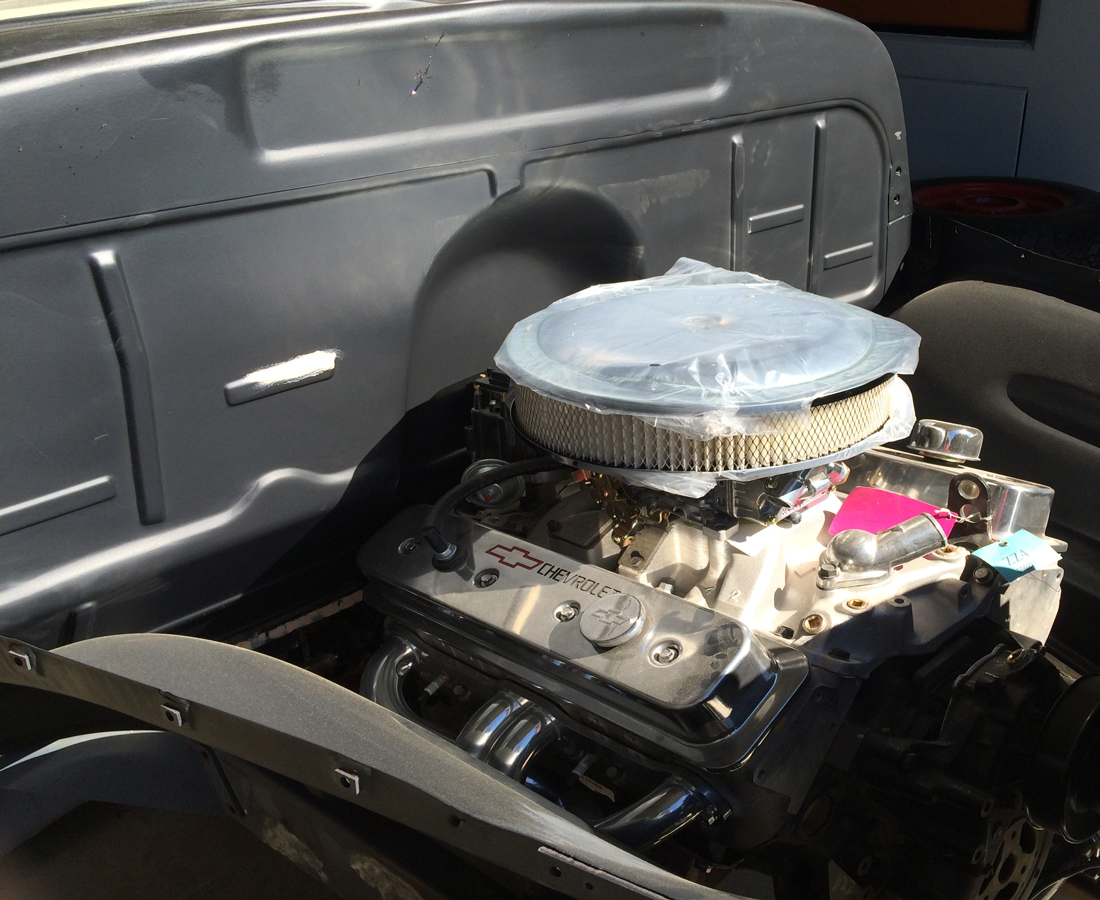
Sat the carby and air filter on the motor for the first time, plenty of clearance to the bonnet.
Fitted the tray back onto the chassis with just a couple of minor adjustments.
Also installed half of the bed timbers and strips.
August 2014
The new toys turned up from Chev's of the 40's.
A new Flaming River steering column and Lacarra steering wheel.
The polished aluminium bed strips for the tray.
AC unit and all the fittings.
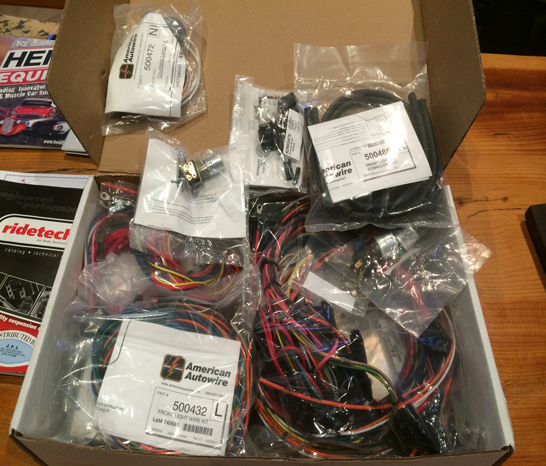
The new Wiring Loom which fits the 55 Chevy and Dakota instrument cluster.
New Front Bumper and bolts.
Pop up Fuel filler for the new fuel tank.
New Rear Roll Pan instead of a rear bumper bar. Comes raw gust spot welded together but fitted straight up, just have to cut out where the licence plate recess is placed.
Designed a custom fuel tank to fit under the bed and is being fabricated locally.
Still deciding weather to go for a Holley Black or Blue Electric Fuel Pump, trying to remove some of the clutter from around the steering box.
Hooker Headers2301 Super Competition Block Hugger Headers arrived and fitted straight on to the ZZ4 complete with the D port.
They are a really tight header and thankfully they missed every thing, chassis, steering and will exit straight down next to the transmission and under the new trans mount.
Picked up the Truck from Ross's work shop and have returned it to my Bro's work shop.
We have decided to do a preliminary build prior to the final paint of the chassis and the cab.
July 2014
Busy month at work but Ross and Sean have been busy on the rebuild.
Finished boxing the front of the chassis and welding out all of the holes in the chassis.
Blanked of all of the holes in the firewall welded, ground and primed the firewall.
Engine mounts have been fabricated and installed, removed the existing gearbox mount and installed the new mount for the Turbo 350.
The under cab break system has been mounted and a HG Holden booster and master cylinder purchased.
The Statement of requirements has arrived from DPTI so build id register with the South Australian Government, thanks to John from the Southern Rod Runners for your help.
21 June 2014
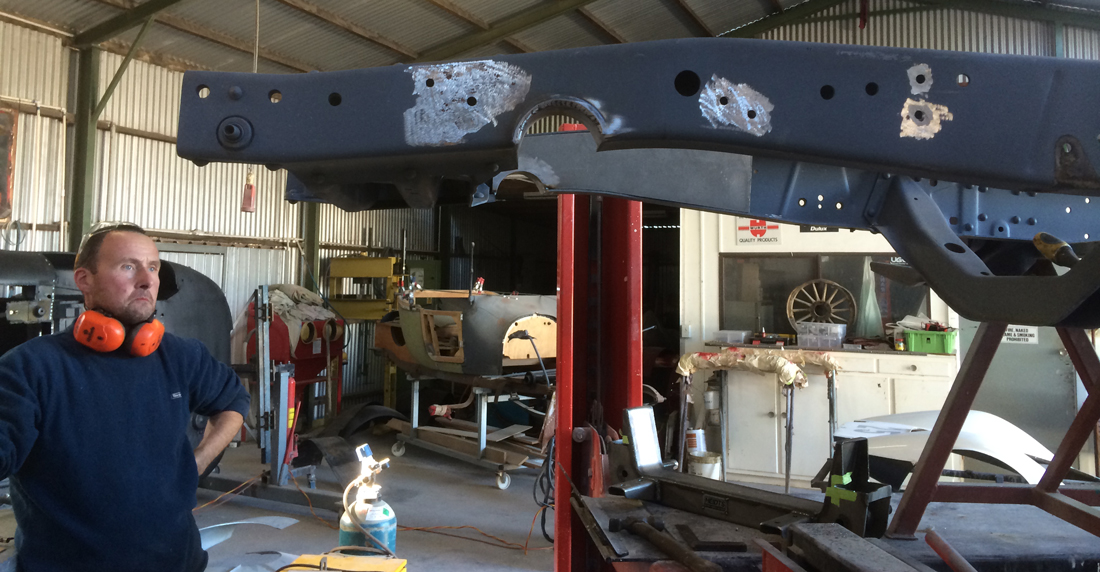
Sean has welded the left hand side front suspension, should be all set to put the front end together.
We need to complete the front suspension, get it set up on the ground so we can set the angle of the diff. To do this requires the motor and gearbox to be installed, new engine mounts and gearbox mount.
The plan is to get all the transmission set then we can measure up for the tail shaft.
While we have it set up we will fit the cab and see if there are any clashes with the transmission. I received the new under cab brake pedal assembly this week so we will trial fit the assembly wile the cab is on the chassis.
After all the trial assembly is done we can dismantle and paint the chassis. Work can start on the Cab panel work.
Drove up to Nuriootpa to drop off the seat to Steve at Stateside Trim who will repair the seat springs and mounts and reupholster the seat.
We decided to go with a "True Red" leather, fairly traditional format for the seat upholstery with the stitched driver and passenger seats and a smooth centre panel.
14 June 2014
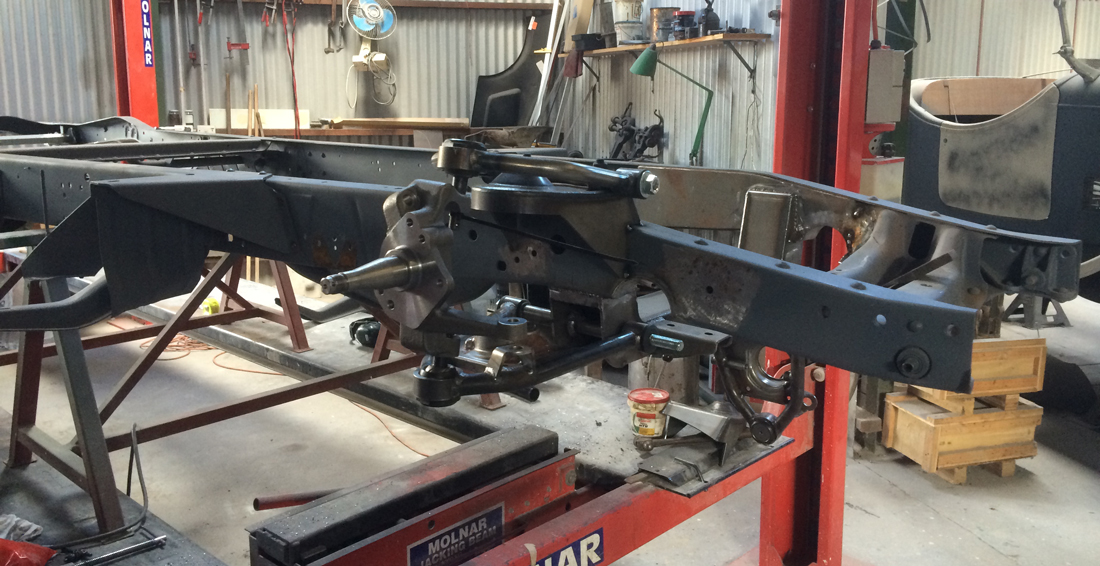
Picked up a set of second hand 15 x 7 rims just to roll the chassis around.
Dom from North Terrace Tyres helped out with a used set of tyres to put on the rims. Still need to purchase the final rims, A set of 15 x 8 Smoothies, just waiting to see what off set will be required.
Sent in the build form to the Australian Street Rod Federation to register the build.
7 June 2014
Sean spent another morning welding the new right front suspension all fitting well just a small 12mm mod to one corner of the upper suspension mount.
Ordered the custom SA number plates "55 Chevy" surprised they were still available, I have twelve months to register the truck.
24 May 2014
Sean has started the installed for the new front suspension, Ross and I spent the day drilling out the old rivets holding the old rear supports not required. We have a new rear upgrade kit to fit out. New leaf springs and shockers. found a non standard shocker support had been welded in, cut that out to make way for the new shocker support supplied in the kit.
18 May 2014
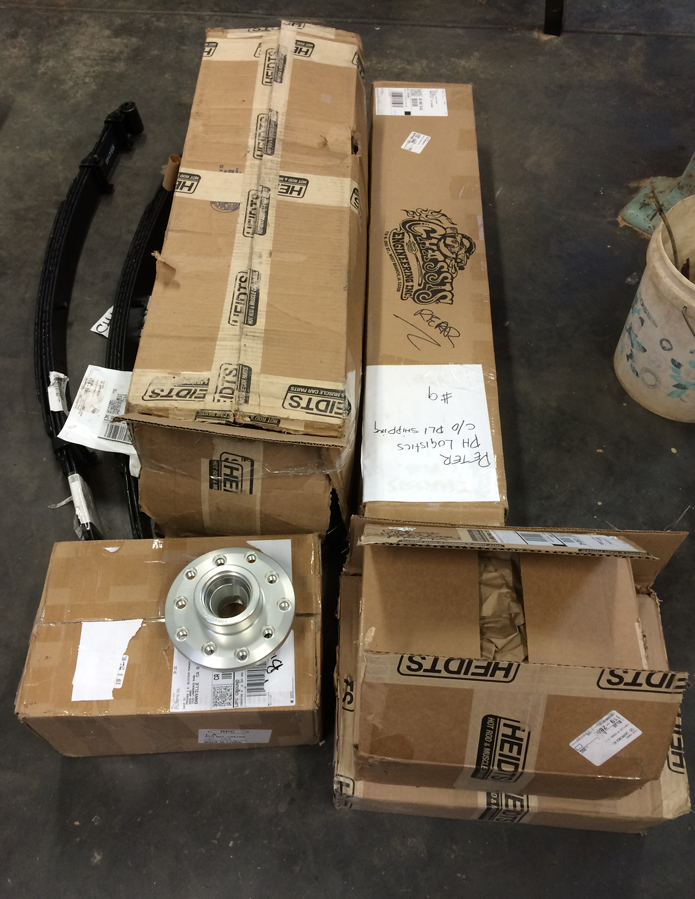
Front end arrived from the US. Picked up looks like all the bits are there.
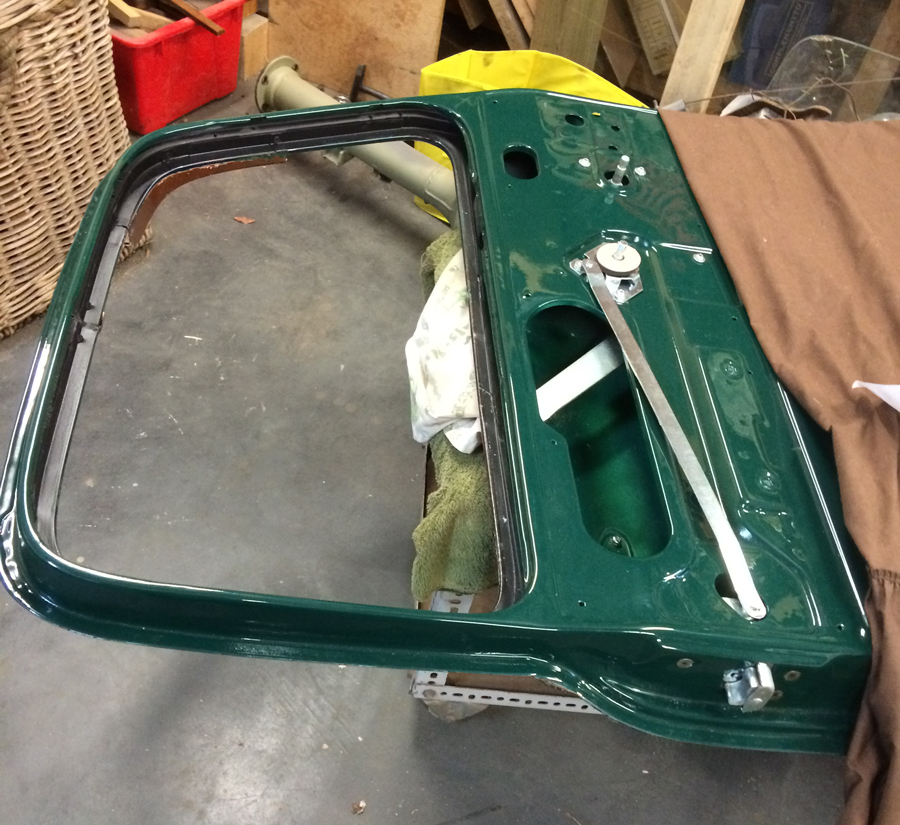
Vent window reassembled with new glass and rubbers, notice small chips where the hardened glass was cut on the open edge.
Doors still need to fit the new weather strips and finish the fit out.
16 March 2014
Busy month at work so not much progress myself.
Ross has been busy with the panel work which is looking good, new photos in the gallery.
I have had a trial fit of the motor and gearbox, the gearbox looks like it will miss by about 80mm and clash with the fire wall. We will also need to modify the original gearbox mount by about 20mm, there is not enough clearance for the gearbox sump.
All the new parts for the doors have arrived so I am now piecing the parts back together. Ordered the new screws and fittings for the final dressing of the doors.
Still waiting on the front end to arrive from America, in transit some where?
When the suspension arrives we will be able to kick on again.
To do;
- find a brake master cylinder and pedal to suit the new front and the F100 rear axle and drum brakes
- Finish the wiring harness design
- purchase the under dash air conditioner unit
2 February 2014
Check out the build photo gallery, there are some shots of the panels being prepared and painted
6 January 2014
Happy New Year and back to work to pay for all the Santa presents over Christmas.
Got a Tee shirt and apron both with Chevy trucks on them for Christmas and my birthday.
Assessment for 2013
Most of the big ticket items have been purchased, just the tail shaft to get made after we have trial fitted the engine, gearbox and rear axel.
LMC Truck has a gearbox mount so went on line and ordered it for the trail fit.
Cab is with Sean for the Dash change over and to fix the corner rust.
Ross has most of the pieces undercoated and has started to paint the doors in his paint shop, Tray and hood are completed ready for the build.
I have the new door glass and cleaned up all the door fittings ready for the rebuild, just waiting for the new handles to come form LMC.
Will finish the door trim with the rest of the cab and bench seat when it goes of to the upholsterer.
Lyn has found a replacement instrument cluster made for the 54/55 Chevy
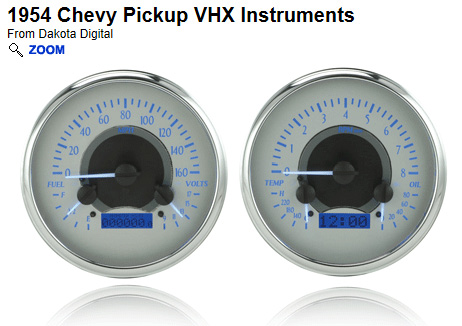
Looking to install a simple Air con system needs a bit more research.
Tyres and Rims are under way with Dom from North Terrace Tyres.
Pedal set and Brake Master cylinder needs a bit more research.
Ford F100 Axels and drum brakes have been restored and all set to go.
Project Time Frame
New front end and rear springs arrive late Jan early Feb 14
Trial fit and finish painting in Feb 14
Start the build in March 14
Looking to kick over the Chevy small block in June 14
Registration and First run July 14
27 December 2013
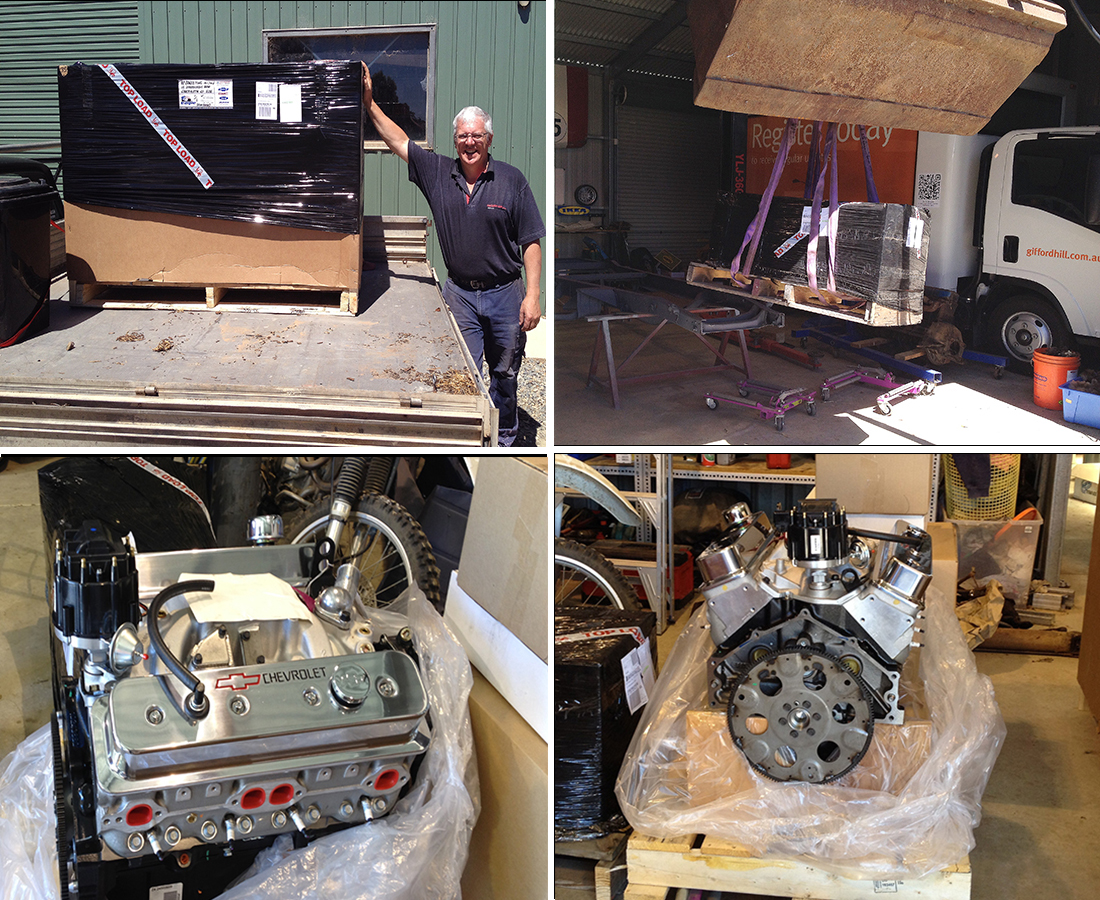
Motor and Gearbox arrived today, sweet.
Unloaded at Lyn's place where the build will take place and using his tractor and soft sling.
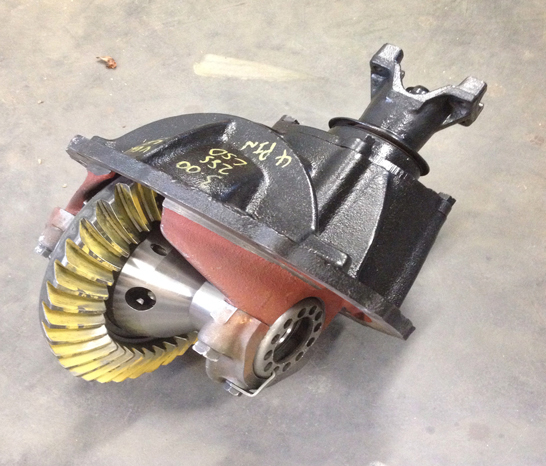
Ford differential
Found a Dif centre on eBay today to suit the F100 rear axel.
Ford 9 inch 1:3 28 Spline, LSD. It is located in Queensland and is on its way.
I have used the CSG Network RPM Calculator and with 27inch OD tyres will have the motor ticking over at 2,427rpm or 28 inch OD tyres would drop it to 2,340rpm at 100km.
I have Dom at North Terrace Tyres checking tyre and rim prices for these tyre OD.
Not sure where this will leave the truck ride height so will not be able to make the final decision until the new front end is fitted.
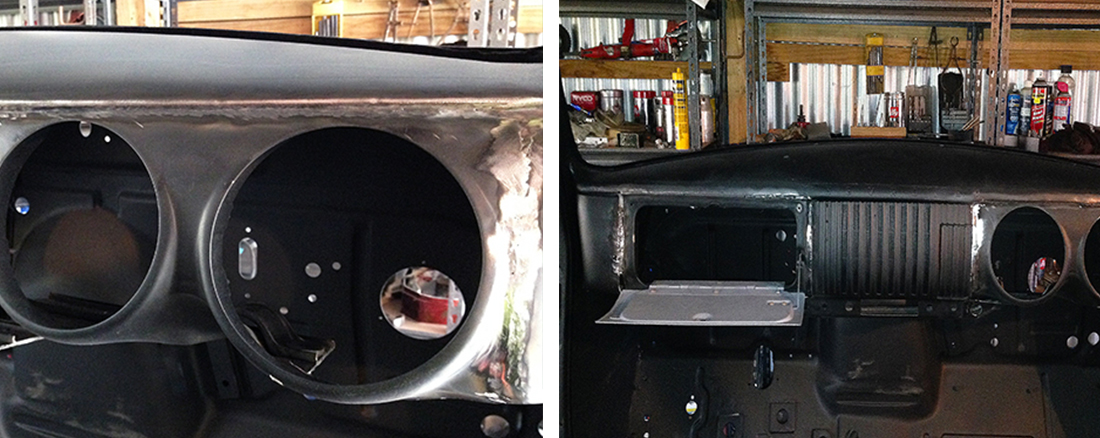
Dash Left to Right Change over
Sean has been at work today and welded in the instrument gauge and glove box for the right hand drive setup.
A bit more finessing to get the curves right but looking good.
This is the big job of the project and the most visible.

20 December 2013
Made the big decision today, purchased the motor and the gearbox from Eagle Auto Parts.
Chevy Small Block
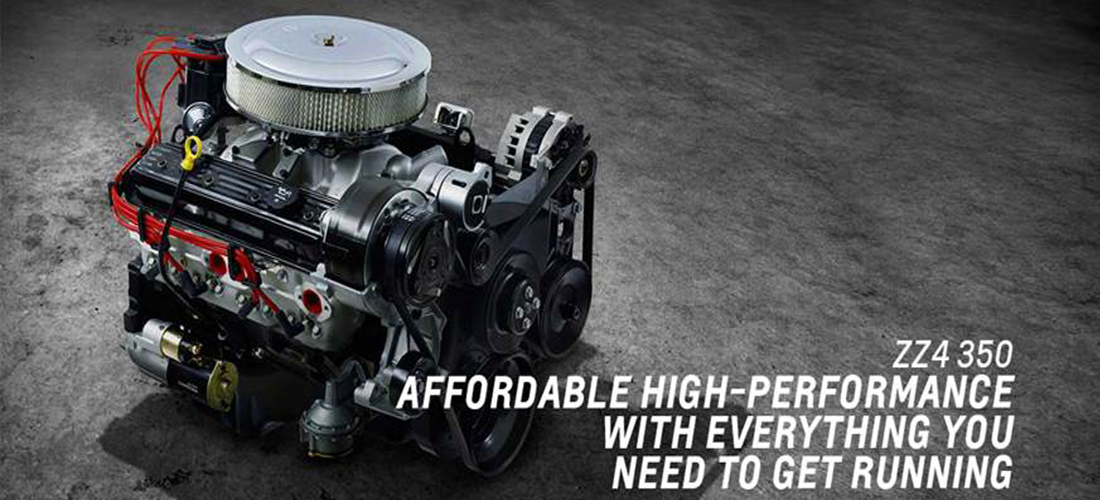
The ZZ4 350 crate engine is Chevrolet Performance’s original affordable crate engine. In Turn-Key form, it comes with everything you need to get it running in your project vehicle.
High-flow aluminum heads are the keys to the ZZ4’s robust 355 hp and 405 lb-ft of torque. They boast 163-cc intake runners, raised exhaust ports, and tight, 58-cc combustion chambers that enhance compression and power. The heads feature 1.94/1.50-inch valves for efficient performance.
The rest of the ZZ4 350 is comprised of premium materials including a brand-new four-bolt block, forged steel crankshaft, high-silicon pistons, and a hydraulic roller camshaft. It also includes an aluminum intake, Holley four-barrel carburetor, and HEI distributor, as well as a starter, water pump, fuel pump, and front-end accessory drive kit — including an air conditioning compressor, alternator
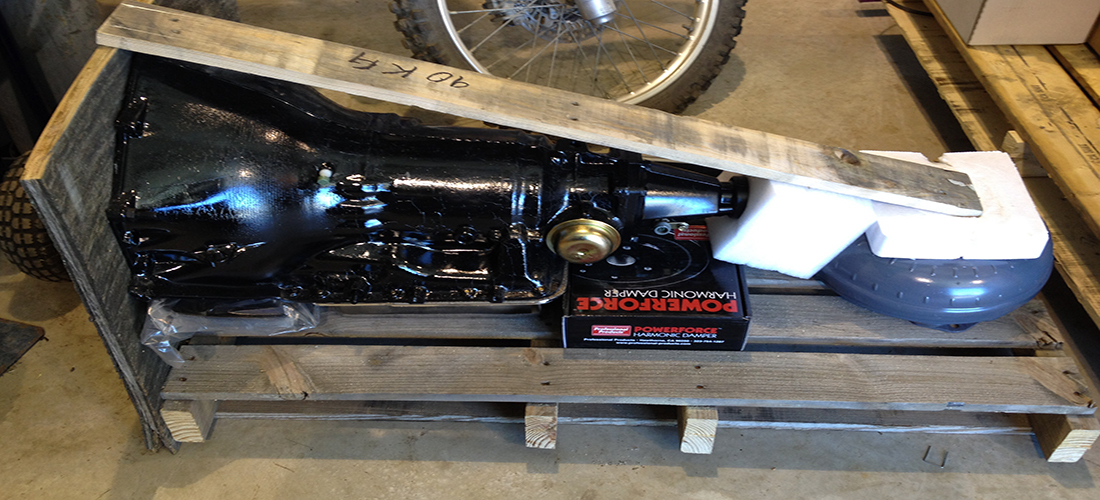
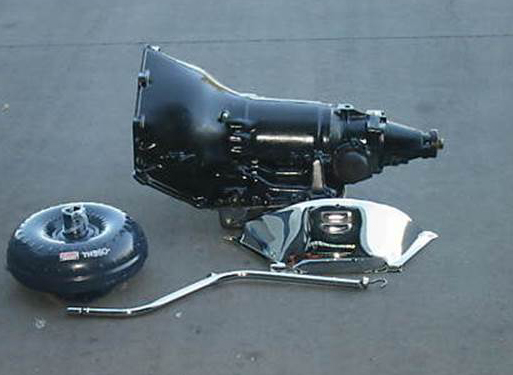
Turbo 350
The turbo is a full reconditioned gearbox ready to be installed.
When the engine and gearbox arrive I will be able to trial fit the cab on the chassis with the engine and gearbox to see if it will need any mods.
Then the cab will be off to Ross at the paint shop.
Ross has started finishing the doors that Sean had cut and welded the new lower inside panels in.
Just the diff to purchase now, working out the ratios now to get the right RPM at 100km and the tyre dimension. Looking like a low 3 ratio for the diff with a 27in tyre.
So off to Dome at North Terrace tyres tomorrow to see what is available in a 27inch? width and white walls.
19 December 2013
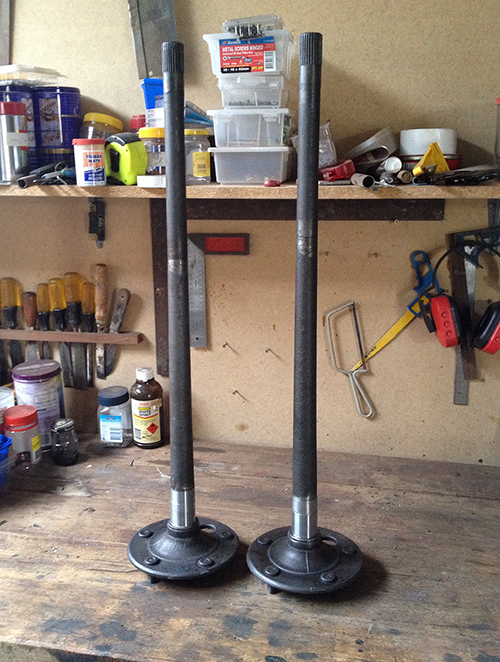
Picked up the rear axels from the hard chromers today, we had a bit of trouble getting the right bearing but on the second attempt we got the right one.
The non LSD and LSD bearing centre are 1mm different. The axels I have are for the non LSD.
11 December 2013
Picked up the new side glass for the Chevy from Mt Barker Glass today.
New Auto glass for the door and vent window.
7 December 2013
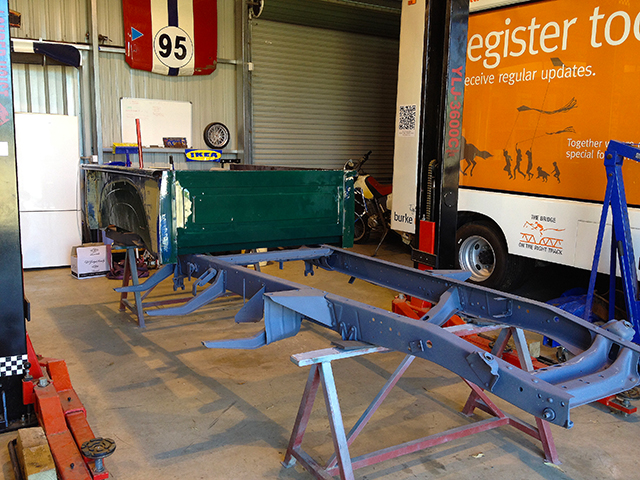
Picked up the tray and trial fitted on the chasis
2 December 2013
Ross has completed the tray with the clear coat ready to pick on the weekend.
1 December 2013
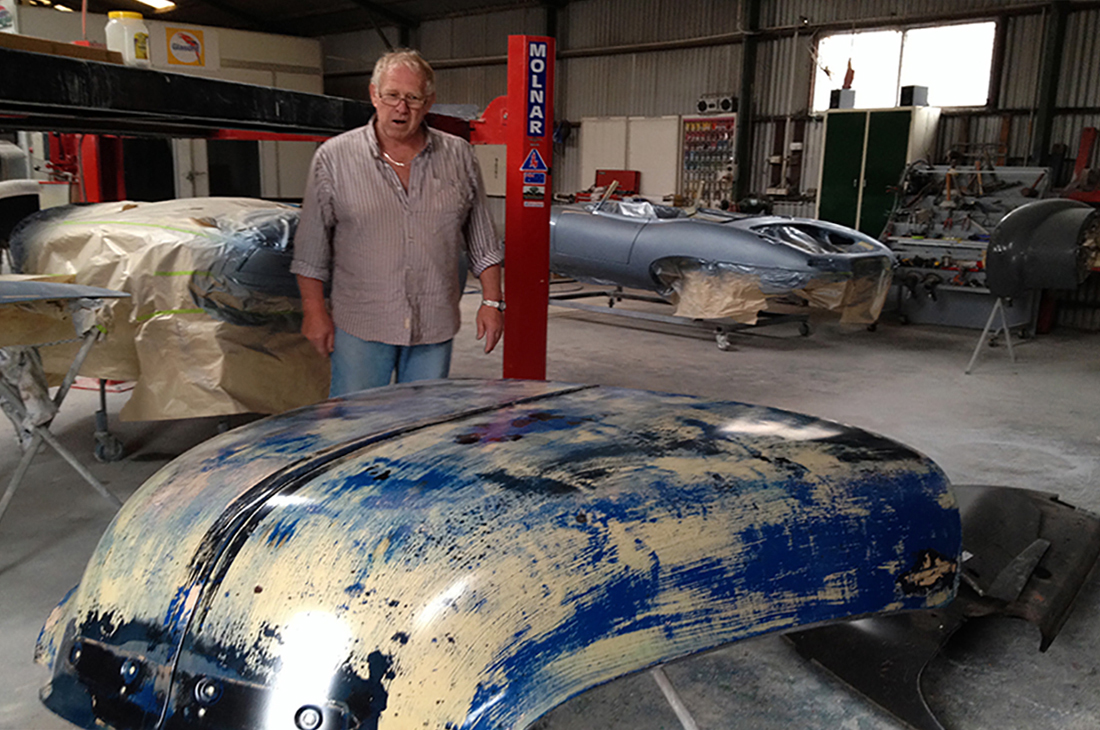
Ross is the project specialist restorer and has finished the first trial panels.
We have kept the original paint job on the outside, just a light rub with 800 grit paper and a commercial clear coat.
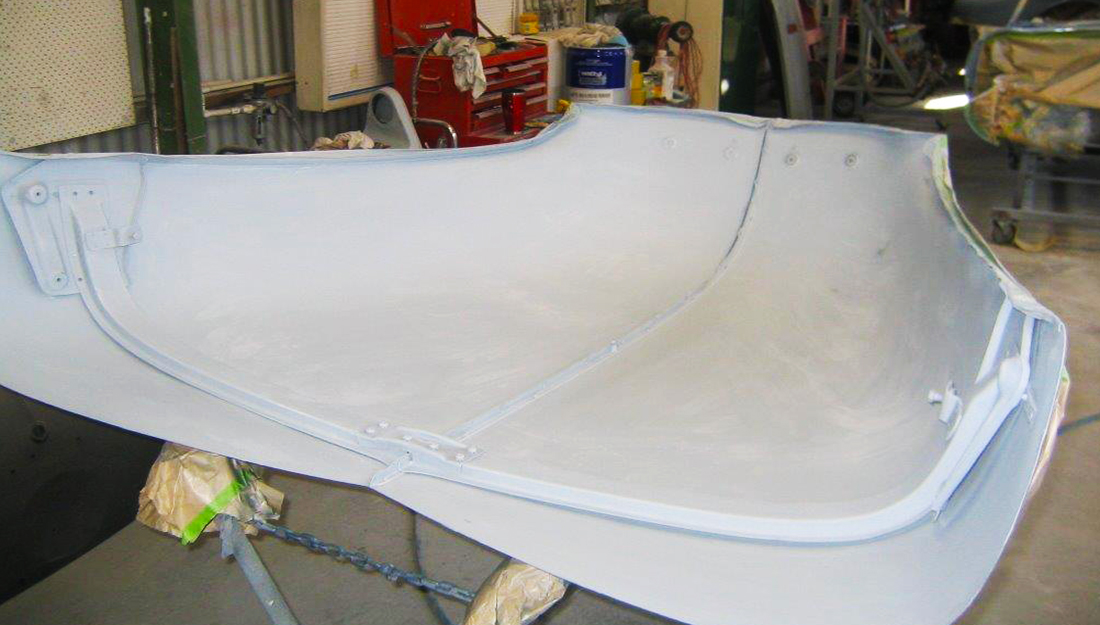
Inside the cab, inside the engine bay and suspension parts will be the original Chevy green. Caught up with Ross to check out the first panel (the bonnet) looks sweet.
The bonnet finished with the clear coat
The bonnet primed ready for the final coat
20 November 2013
The new front end and the rear spring upgrade has left the JPL factory in the US.
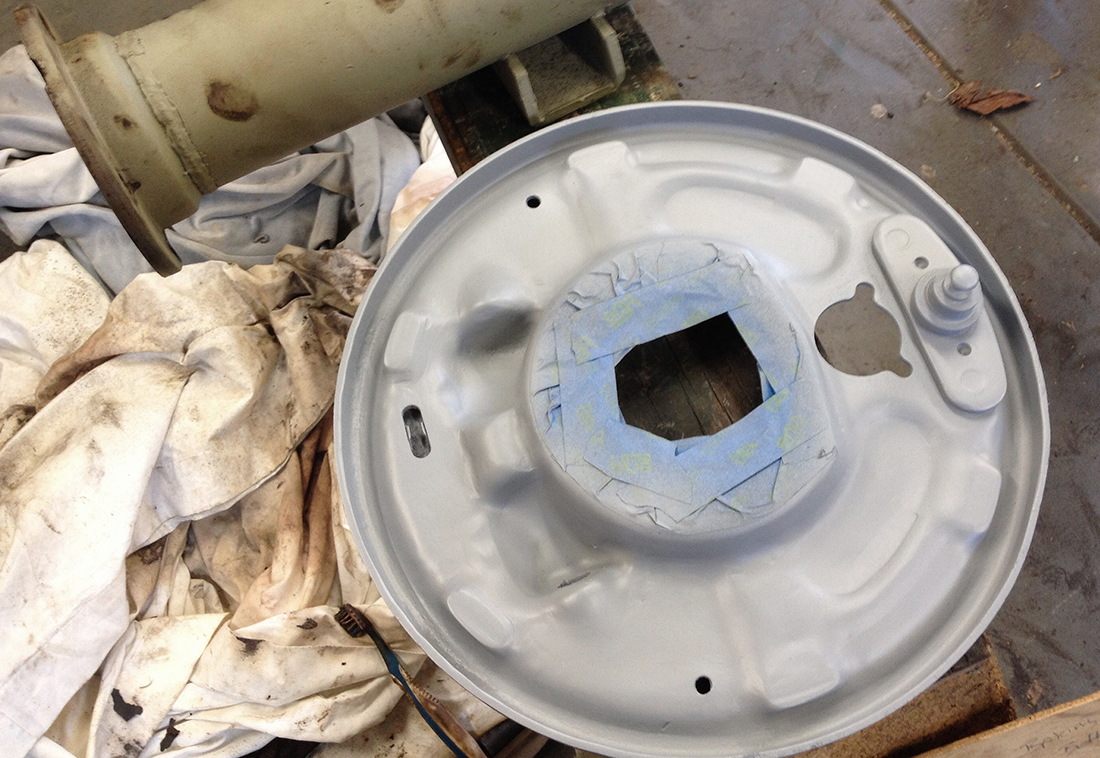
The second hand ford rear end has been puled down and cleaned after the and blasting, the brakes need a rebuild, so after dismantling the brakes I took them of to PBR for the drums to be reseated and new wheel cylinders and springs.
The parts are all cleaned up and primed ready for painting after all the suspension parts are fitted and any mods completed.
25 October 2013
Received the shipment from LMC Truck today.
All the rubber seals, mirrors, lock set including keyless remote and the parts we will need to rebuild the truck.
One more order to place for cosmetic bits.
21 September 2013
Just been doing small jobs for the last couple of weeks, started repairing the bench seat and cleaning and priming small parts.
Today Sean has welded the new tray rails back in place and we have also spot welded a couple of areas around the tray where some of the body work had cracked trying not to effect the original paint work.
The tray is ready to go to the grit blaster to blast the chassis and inside the wheel arches. The chassis and the wheel arches will be the original green and the rest of the tray will be clear coated. We will use the tray as a trial run for the rest of the truck. The fenders will need a bit of work where the steel is cut or broken, the decision has been made to leave the existing repairs as is. Cleaning up too much will interfere with the existing theme and may start to look out of place. Any way if it doesn't work we can always fix it later.
18 August 2013
Today I decided to let loose with the grinder my self, removing the rusted tray rail. The new tray rail has been cut and holes drilled for the American Oak tray and is ready for welding back into position.
17 August 2013
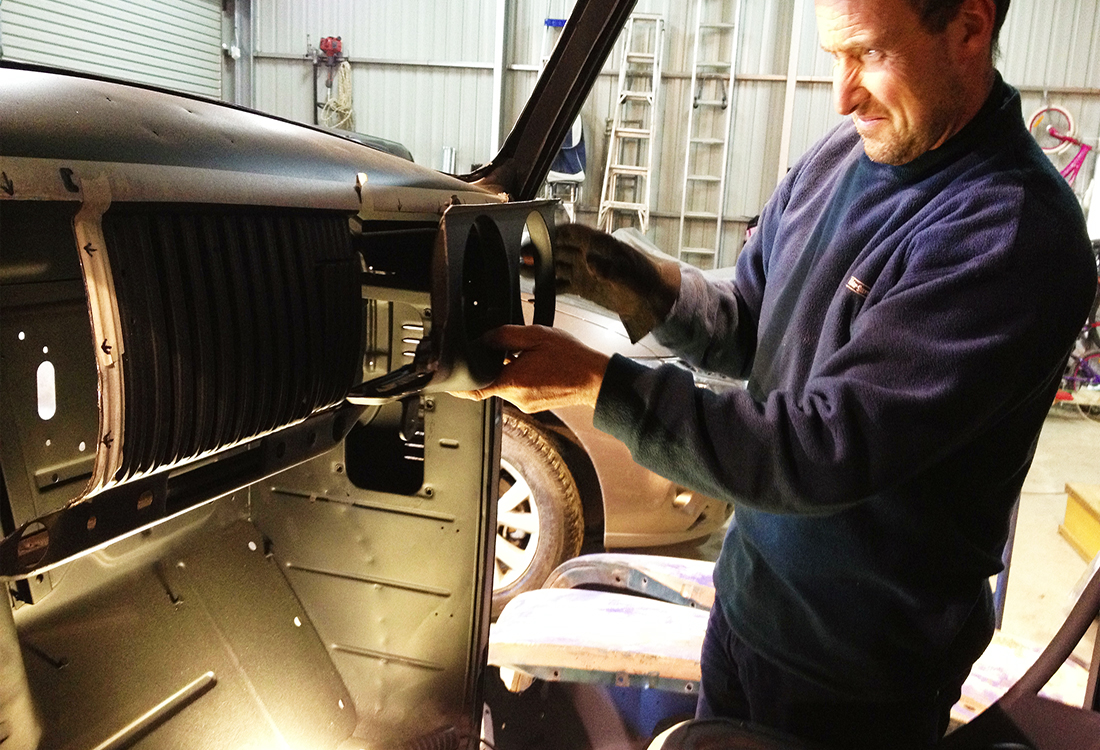
Today is the big day, Sean is going to cut the dash and rebuild as a right hand drive. After careful consideration the dash was marked up and measure two or three times, then out came the grinder.
All went well with Sean being very happy with the cuts.
I spent the day cleaning up and priming small pieces ready for painting.
7 August 2013
Picked up the cab from the grit blaster today, it is back in the shed ready for the rebuild.
There will be one more trip to the grit blaster for the underside of the hood, the inside of the doors and some smaller pieces.
23 July 2013
The dismantle has been completed and today is the start of the rebuild.
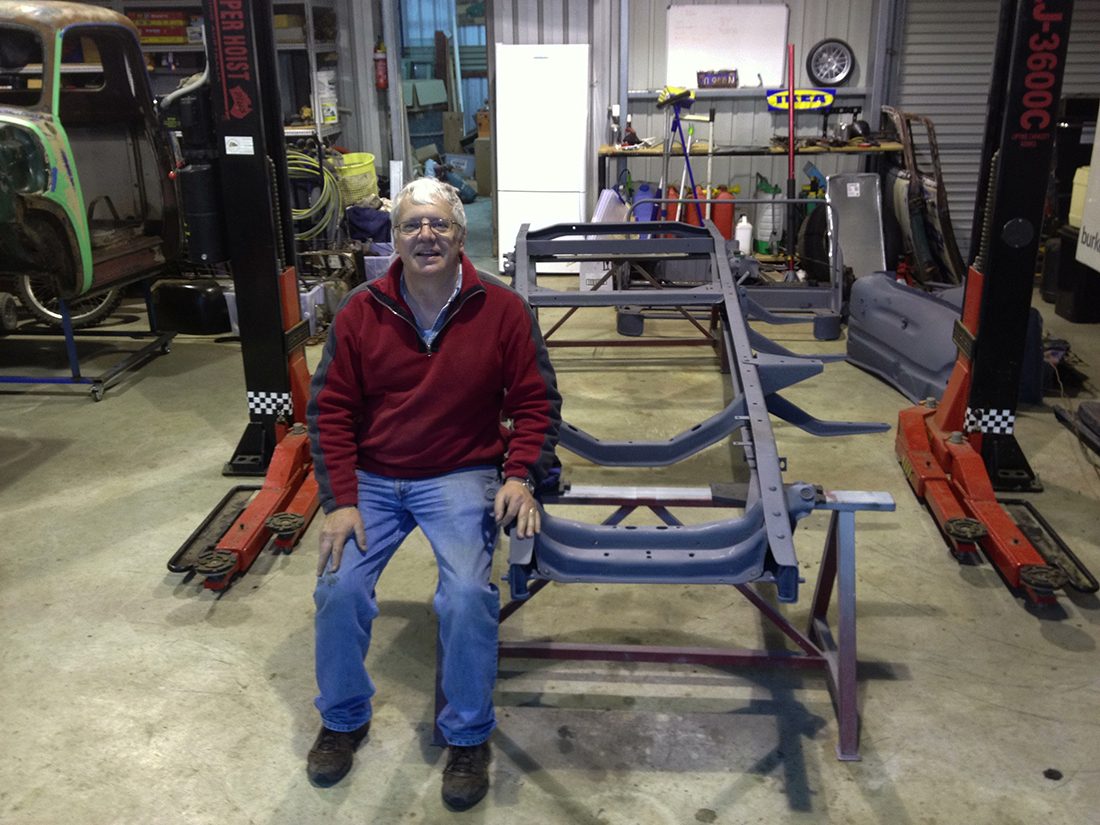
Picked up the chassis and panels from the grit blaster today and we are ready for the rebuild.
Jobs to do
Confirm the suspension complies with Aus regs – Tonkin engineering
Rod is chasing down the motor, gearbox and dif
Sean is working on the tail gate and tray supports
Lyn has updated the blog site
Holidays are finished and I need to go back to work and earn the $ for the new parts.
